This article will show you how to configure Outlook 2013 Font using Group Policy.
Using this method, you can configure the following settings:
- Default new email font color and size
- Default reply and forward color and size
- Email Comments
- New Theme
The only requirement is to have Outlook 2013 Installed on the machine from which you are running this process.
How To Configure Outlook 2013 Font Using Group Policy
To complete this, you will need to Install Office 2013 Administrative Templates or Office 2016 as minimum requirements
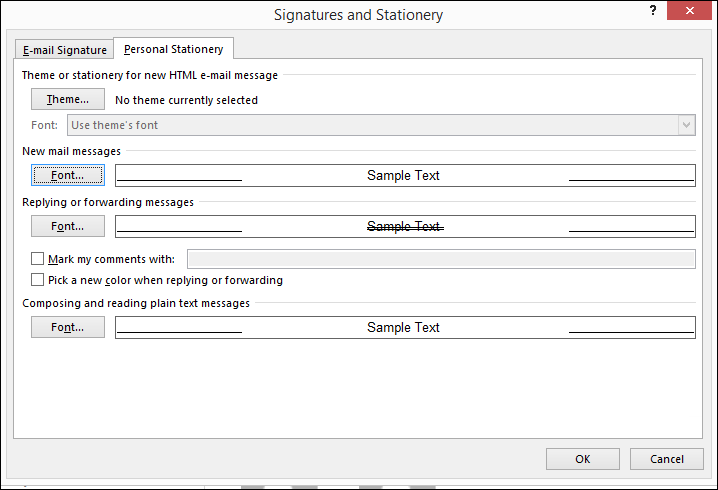
Open Outlook 2013 and configure the font settings from the options menu to get started.
Step two: Open the Registry editor from the run menu, go to the path below and export the mail settings folder:
HKEY_CURRENT_USER\Software\Microsoft\Office\14.0\Common\MailSettings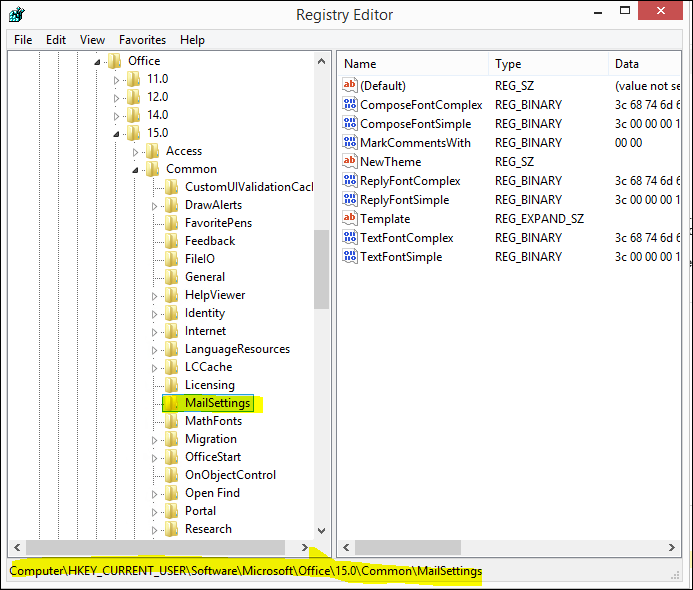
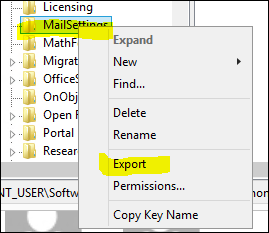
Export by clicking on the MailSettings folder
Next, we need to convert the .Reg file to .XML using the website below:
http://www.runecasters.com.au/reg2gpp
When converting the file make sure you select Create, when done save the file.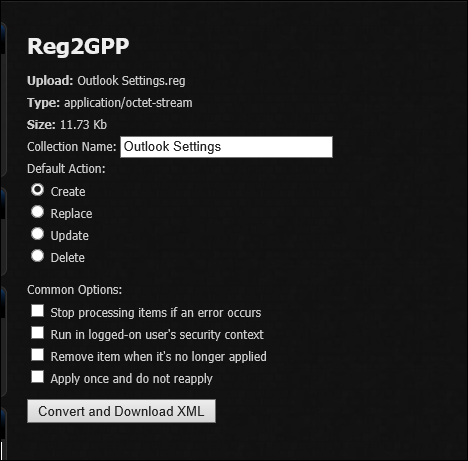
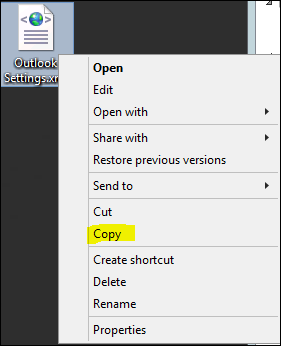
Next right, click on the .XML file and Click Copy
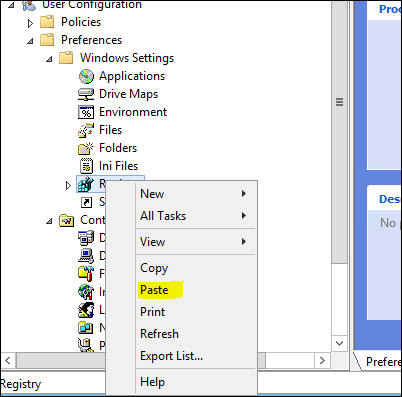
The last step is to open Group Policy Editor and go to:
User configuration\Preferences\Windows Settings\RegistryRight Click on Registry and Paste
HKEY_CURRENT_USER\Software\Microsoft\Office\14.0\Common\MailSettings
mistake, it should be 15.0